This post is a step-by-step guide to get Dialogflow API credentials for setting up authentication to send query messages and retrieve intents information using HTTP requests.
Step 1 – Google Project ID
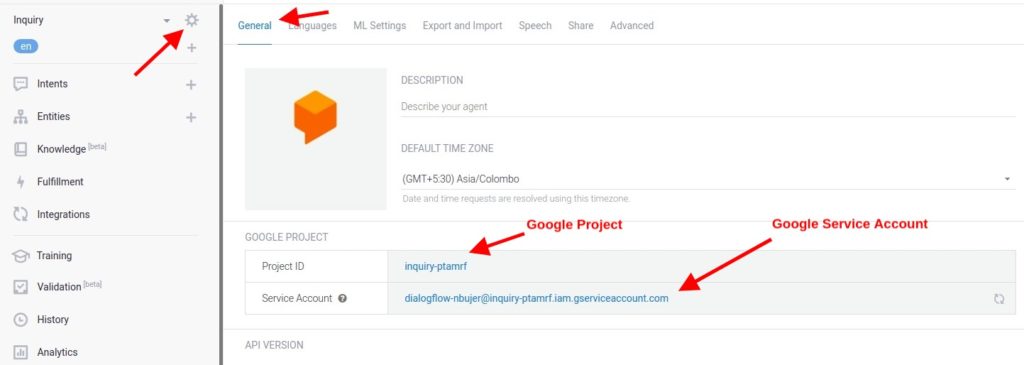
When you create a Dialogflow agent, a Google Project is created automatically or you can choose an existing Google project. Along with this Google Project, a Google Service account is also created which has all permissions to communicate with the Dialogflow.
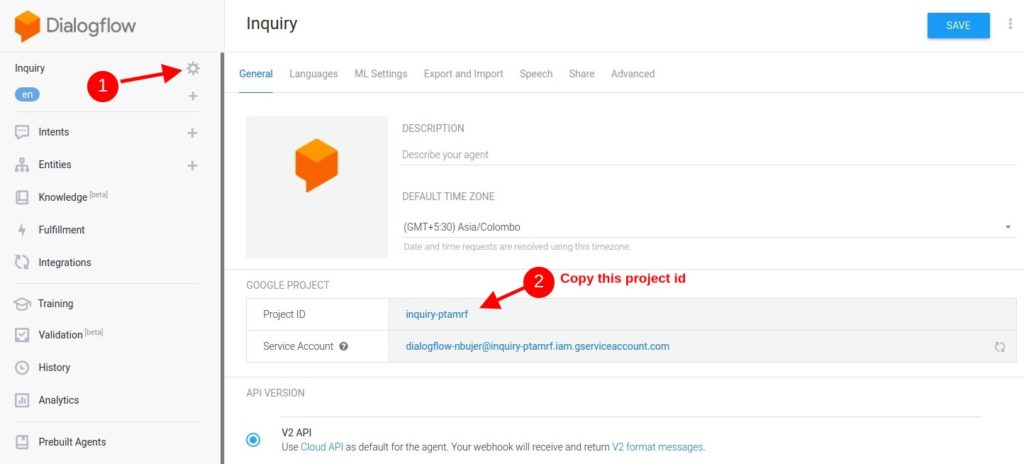
Log in to your Dialogflow account and select your agent. Then click on Gear Icon next to your agent name and copy Project ID as shown below:
Step 2 – Create Service Account
We need to add one more google service account to get Dialogflow Client access permission to access the Dialogflow API.
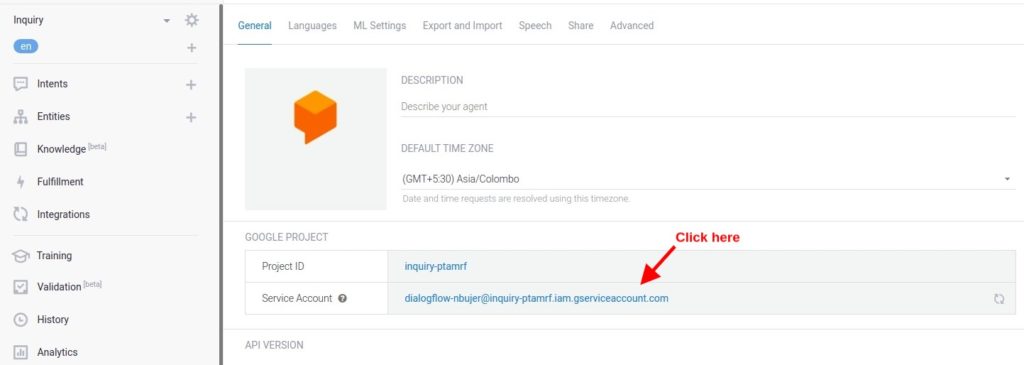
Click on the Service Account name and you’ll be redirected to the Service Account page of your google project.
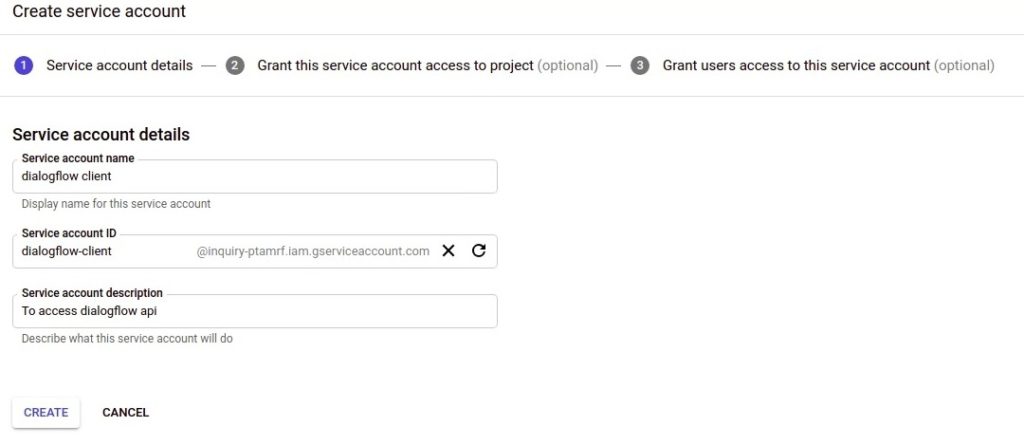
Click on Create Service Account link at the top menu and you see a Service account details page in the first step.
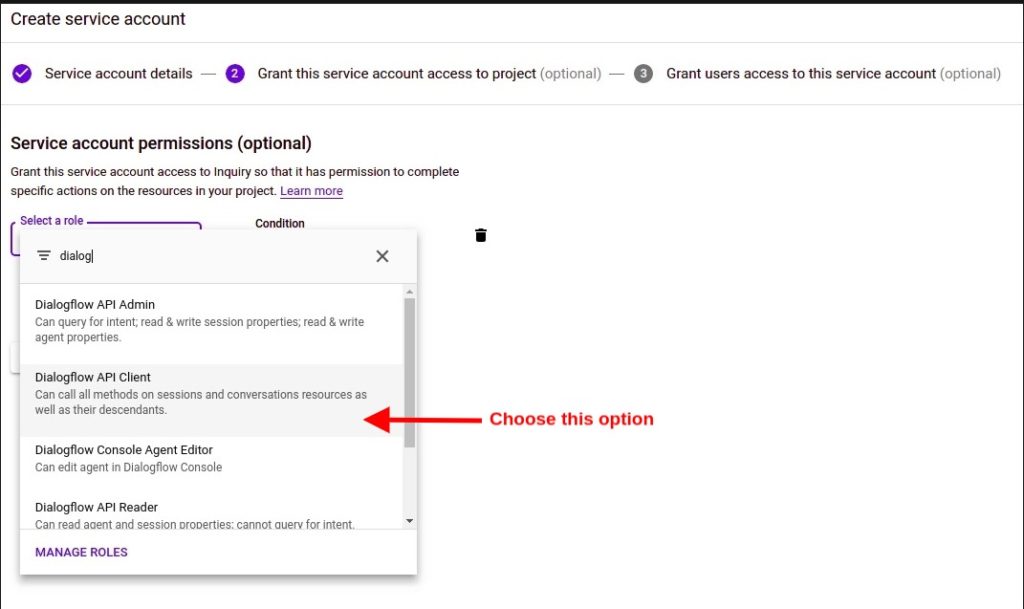
Enter here service account name and service description and click on Create button. On the next page, you’ll see Service account permissions settings.
Select Dialogflow API Client role and click on the Continue button. The next page is to grant users access to the service account you just created.
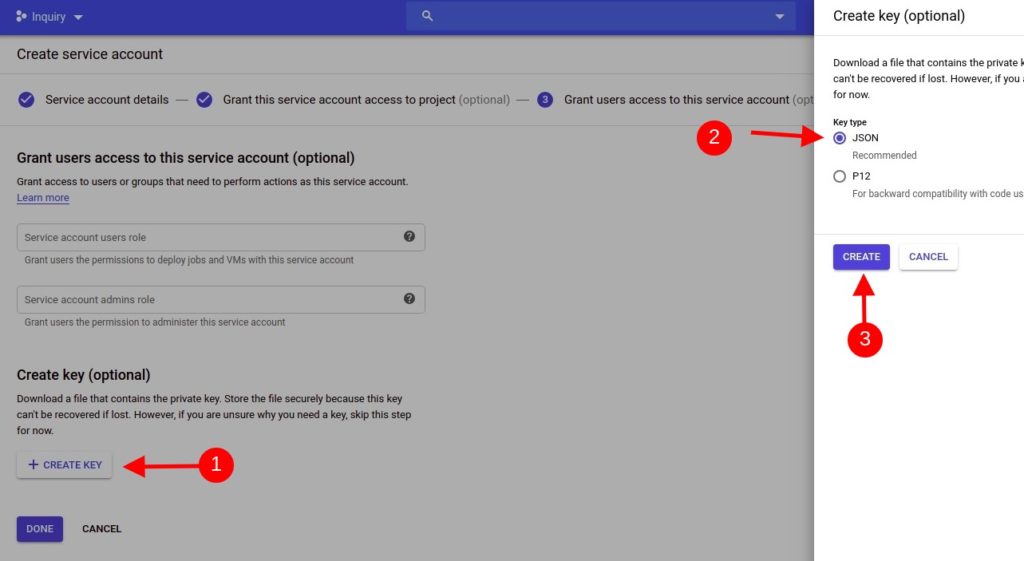
You may leave Google Users Role and Admins Role to empty and Click on the Create Key button and choose JSON in the Key type option.
And click on the Create button. This will allow you to download a JSON file which consists of private keys so keep it at a safe place and don’t share it publicly.
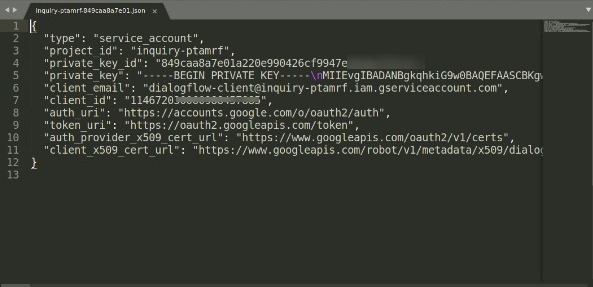
Open the JSON file and you see here all required information we need for the authentication. You can get Project ID from this file as well. Most of the time you need Client Email and Private Key to use in your API project.
In this tutorial, let’s build a small inquiry chatbot in Dialogflow to ask the user’s information and save it into a CSV file. Once you understand this tutorial, you will be able to save data into a database or send it to third-party applications using the same concept.
Building Inquiry Agent with Dialogflow
Follow the steps given below to build out the Inquiry Agent.
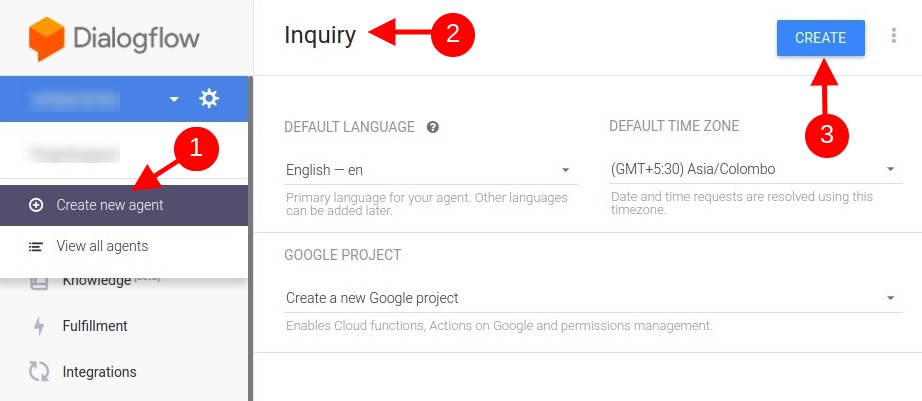
Step 1 – Create an Agent
Go to Dialogflow and log in with your credentials. In the top-right, from the main menu, click on Create Agent. This will bring up the Agent setting screen, where you can define the Agent name, description, and timezone.
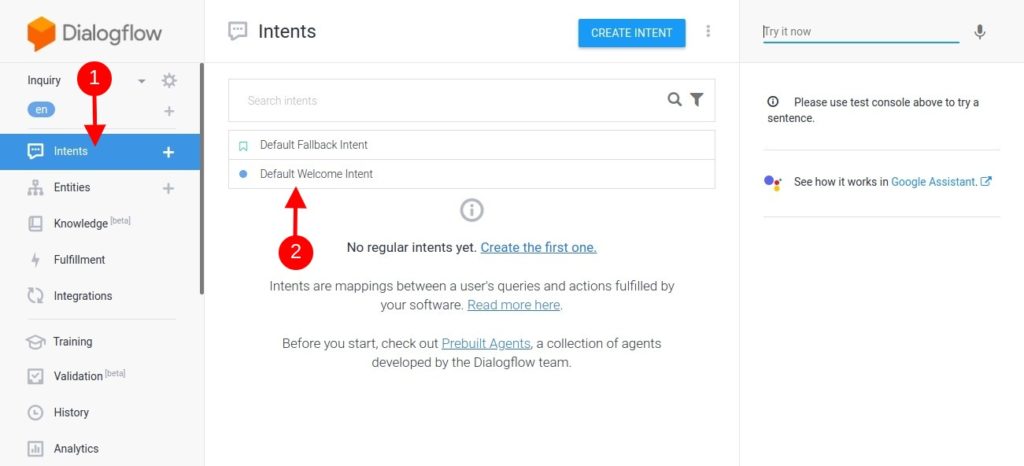
Step 2: Create the Intent
Click on the Intents and then click on Default Welcome Intent.
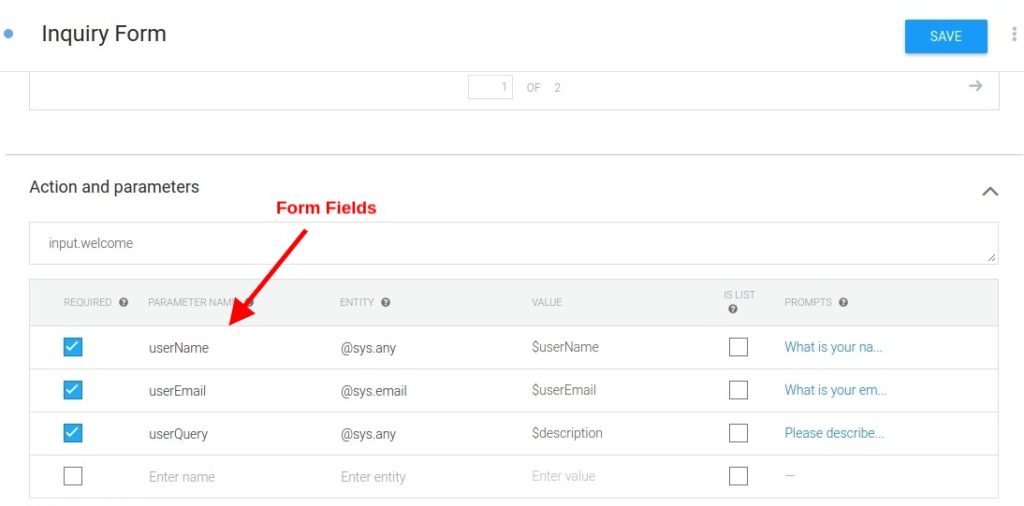
Now, rename this intent to Inquiry Form and scroll to Action and parameters. Here we’ll create inquiry form fields as parameters by clicking on New Parameter and will make each field as a required field.
Step 3: Add Response
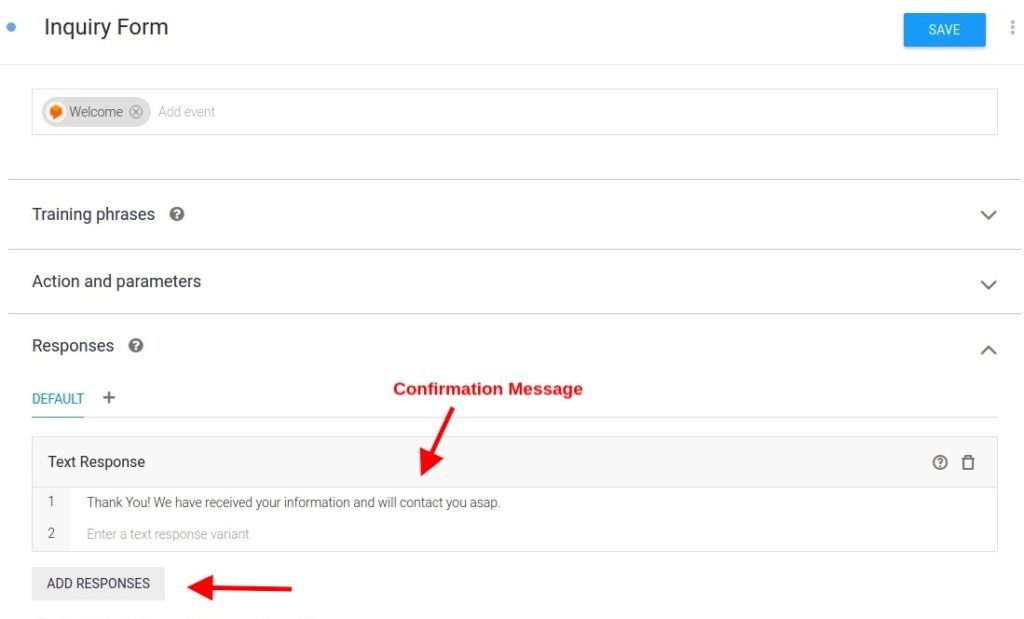
Once all information will be filled by the user, we’ll send a confirmation response. Go to the Responses section and click on Add Responses. Choose Text Response and enter confirmation message. e.g Thank You! We have received your information and will contact you asap.
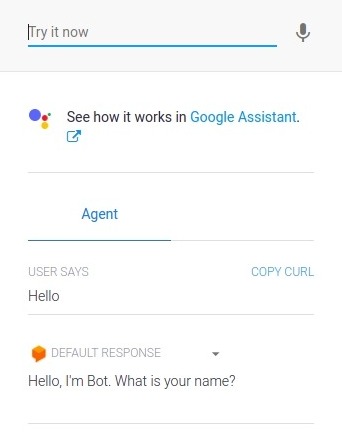
Step 4: Test Inquiry Agent
We can test this simple inquiry bot using the test console on the right side. Once we’re happy with the agent functionality, we’ll move to the fulfillment part.
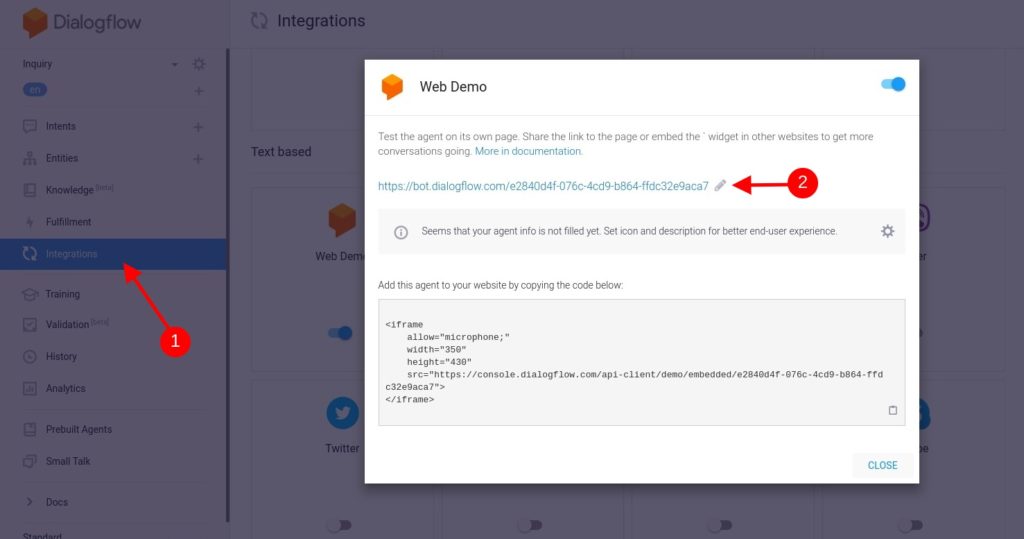
You can test this bot on a live web demo URL for a better user experience. Go to Integrations on the left side main menu and enable Web Demo.
Sending Parameters to Web Server
In the following steps, we’ll create a web service API using node.js and will send user inquiry information using a webhook and save the information into a CSV file.
Step 1: Setup Project
We’ll start from an empty folder on your computer and will install all the required libraries and then move to the coding part.
Create a folder ‘dialogflow-webhook’ and go to the folder.
mkdir dialogflow-webhook
cd dialogflow-webhook
Initialize the project using ‘npm init’ and enter ‘dialogflow-webhook’ as the name of the package and leave all other fields default.
npm init
and enter ‘yes’ to finish the initialization process. A new ‘package.json’ file is created to manage all package dependencies.
Now install node.js packages required for the project.
request – To send HTTP requests to Google Dialogflow.
csv-writer – To create & save CSV file.
fs – To create file streams.
Step 2: Source Code
I have placed the code at the GitHub repository used in this tutorial. Below are the explanations of each section. Create an app.js and put all the below code in this file.
Initialize the app variable to start a web server and specify the port number to listen to. Use the body-parser library to handle the get and post data and convert them into a JSON object.
Dialogflow will send a POST request to send intents parameters to our web service when webhook are enabled. Our web service should meet all the webhook requirements specific to the API version enabled in this agent.
First, create a CSV Writer object and specify the file path and CSV columns. Here we defined User Name, User Email, and User Query columns.
We can access the post values using req.body and then get parameters values using req.body.queryResul.parameters key.
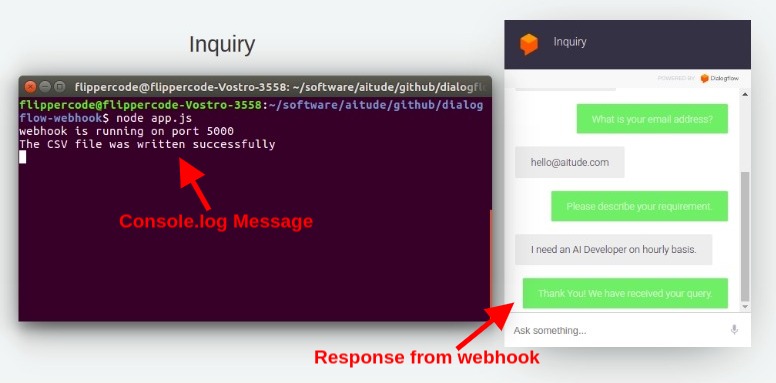
Use writeRecords function to write new records in the CSV file and show a log message in the console.log.
Dialogflow expects a JSON response from our API. This response can be a text message or an advanced response payload.
Listen to Server
In the end, start listening at the server on a specific port.
// Listen Requests
app.listen(port, function () {
    console.log('webhook is running on port', port)
})
Run Code
To start the server, run the following code and hit localhost:5000/webhook/ in the browser.
node app.js
So callback URL is localhost:5000/webhook/ but we need a live public URL to set up a webhook on the Dialogflow Fulfillment page.
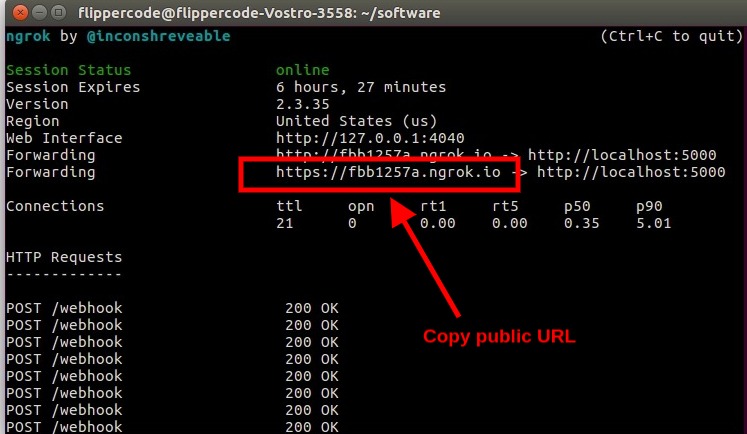
Use ngrok
ngrok exposes local servers behind NATs and firewalls to the public internet over secure tunnels.
To create a public URL, download the ngrok tool. Start a new terminal and run below command to start an HTTP tunnel on port 5000. Read ngrok documentation here.
ngrok http 5000
Now copy the public URL and we’ll set up this webhook URL into the Dialogflow Fulfillment setting page.
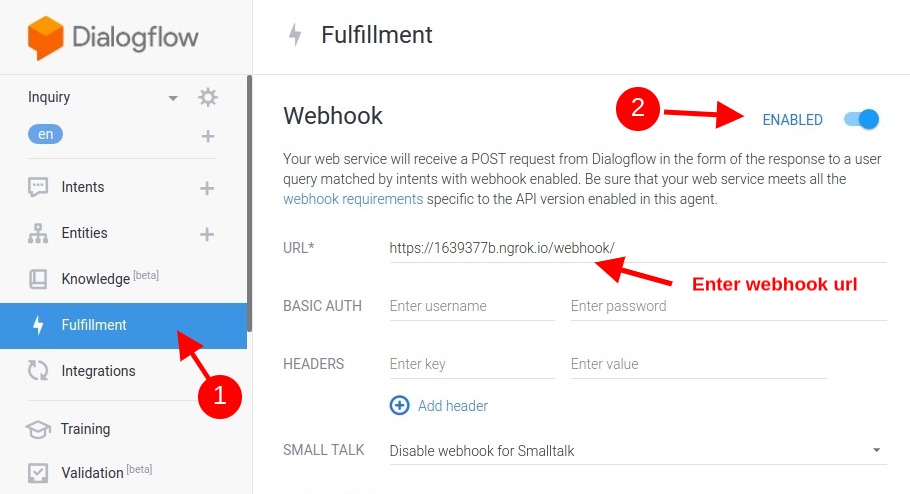
Step 3: Enable Webhook Service
Go back to your Dialogflow Account and click on Fulfillment link in the main menu left side. Then enable the Webhook service.
Enter here webhook URL you copied from /.ngrok command and click on Save button at the bottom.
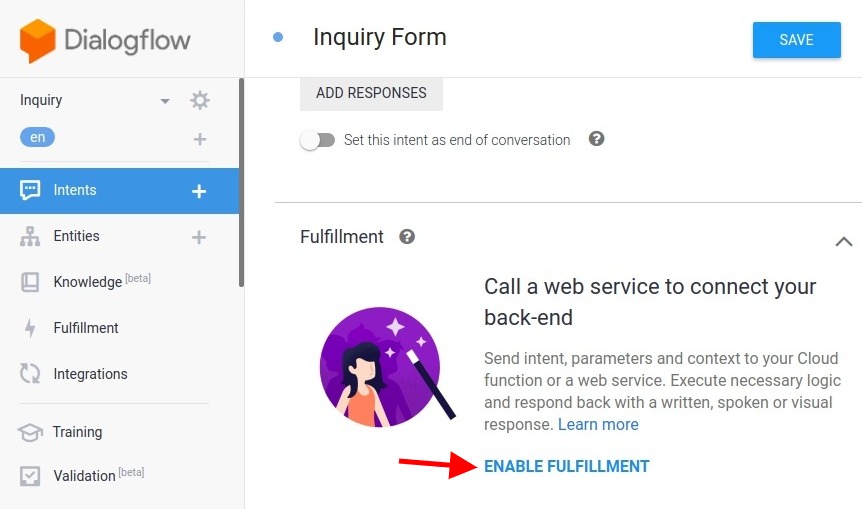
Now click on Intents in the main menu and select the Inquiry Form Intent. Go to the bottom Fulfillment section and click on ENABLE FULFILLMENT link.
and then enable the Webhook call for this intent. So once all required parameter will be entered by a user, a POST request will be sent to the webhook URL and our server will receive all parameters and will save in a CSV file. let’s test this in the next step.
TEST INQUIRY CHATBOT
We can test it using Test Console on the right side but we’ll test this bot on a live web demo URL. Go to Integrations on the left side main menu and enable Web Demo. Copy the live demo URL and enter in the browser URL.
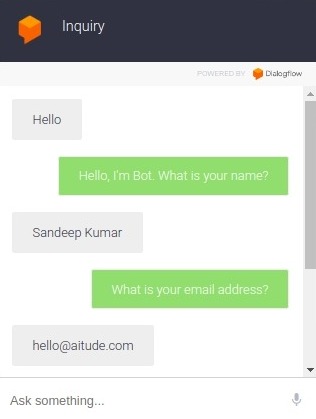
Start the conversation with a Hello and enter a name, email, and the query.
In the end, Parameters will be saved in a CSV file and text response will be sent to the user.